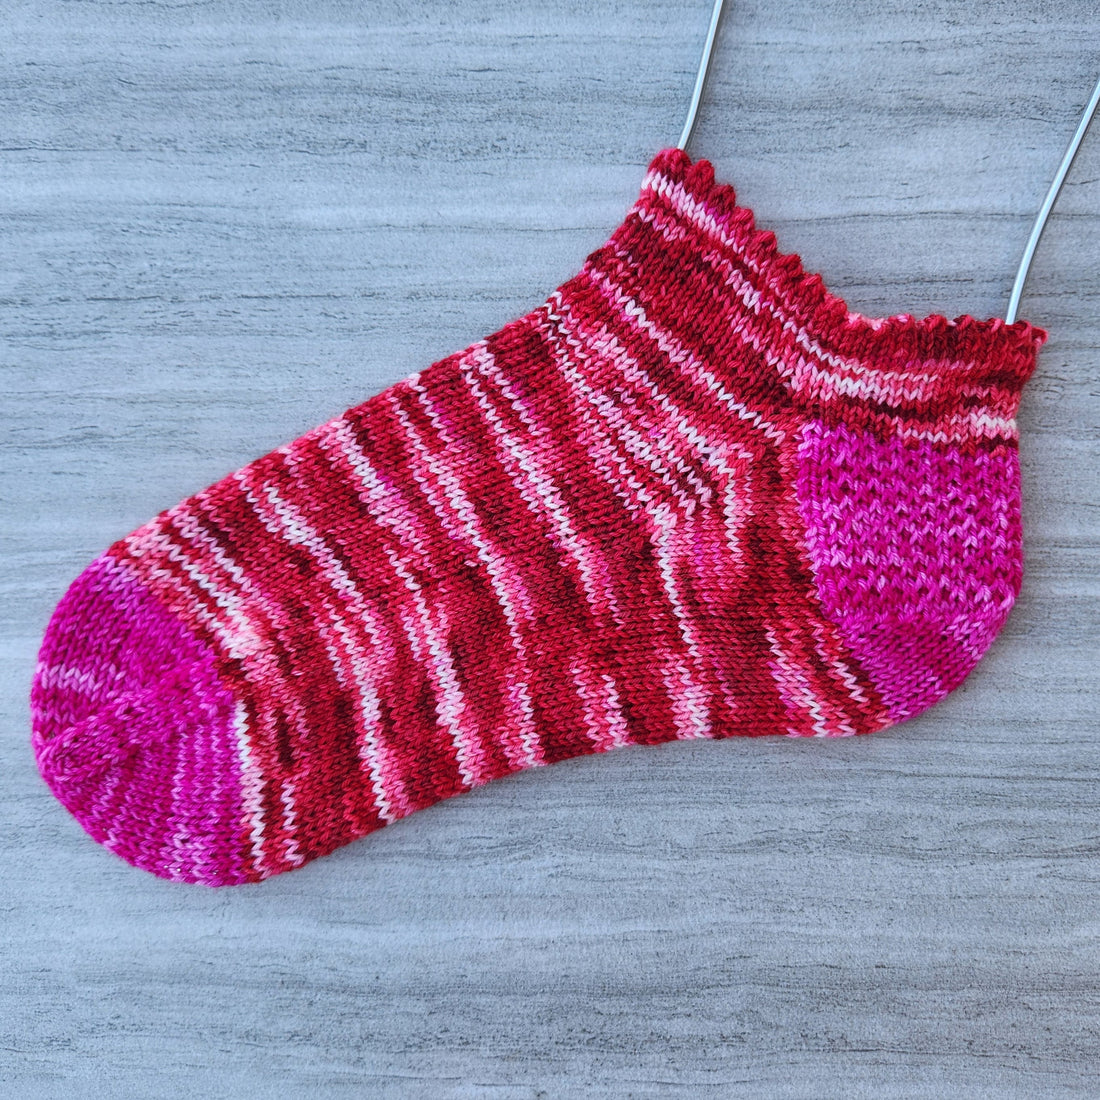
Picot Shorties Socks Free Knitting Pattern
Share

Sizes: Adult Small (Medium, Large)
Finished Sock Circumference: 7” (8”, 9”)
Designed for a Foot Circumference of 8” (9”, 10”), allowing for approximately 1” of negative ease.
Leg Length and Foot Length: adjustable to fit
Yarn: Fingering Weight Sock Yarn, approximately 50g of the main color (MC) and an additional 20g of a contrasting color (CC).
Needles: US 1/2.25mm, or size needed for proper gauge.
Set of 4 double pointed needles, one long (24-32”) circular for magic loop, or whatever sock knitting method you prefer.
Notions: stitch markers, tapestry needle
Gauge: 8 stitches per inch, stockinette, in the round.
PATTERN INSTRUCTIONS
Cuff
The picot cuff is formed by knitting a short tube in stockinette, with the center round containing eyelets. This tube is then folded over, and the eyelets will form a picot edge. A video tutorial on how to create this cuff is available on my YouTube channel. I have the video posted later on in the pattern, so keep scrolling!
Using the German Twisted Cast-On, CO 56 (64, 72) sts in MC.
Distribute sts across needles as preferred and join in the round, being careful not to twist sts. Place marker to mark the beginning of the round.
Rounds 1-5: k in stockinette (k all sts)
Round 6: [k2tog, yo], repeat until end of round.
Rounds 7-11: k in stockinette
*at this point, I recommend weaving in the end of yarn from the CO. Weave into the reverse stockinette side (ws) of the work.
Round 12: Fold over the cuff so that the CO edge is now lined up with the round you are currently knitting. You will insert your working needle into the first st of the round AND then the back loop of the first CO st. Knit through both of these loops to permanently fold and form the cuff. Since you want to keep your cuff stretchy, be sure to keep the stitches a little bit loose, but neat. Repeat along the remainder of the stitches of the round.
Leg
Rounds 1-8: k in stockinette. On the last round of the leg, work the first 28 (32, 36) sts and then immediatelybegin the heel on the back half of the sock.
Heel
The eye of partridge heel flap is worked back and forth on the back half of the leg sts.
Drop (do not cut) MC. With CC:
Row 1 (RS): [Sl 1 purlwise with yarn in back, K1] 14 (16, 18) times. Turn.
Row 2 (WS): Slip the first stitch purlwise with yarn in front, and then purl across the entire row. Turn.
Row 3 (RS): Sl 1 purlwise with yarn in back, [sl1, k1] 13 (15, 17) times, k1. Turn.
Row 4 (WS): Slip the first stitch purlwise with yarn in front, and then purl across the entire row. Turn.
Repeat rows 1-4 a total of 7 (8, 9) times. This will give you a total of 28 (32, 36) rows on your heel flap.
Heel turn:
Row 1 (RS): sl 1 purlwise with the yarn in back, then K14 (16, 18) stitches, SSK, K1, turn.
Row 2 (WS): sl 1 purlwise with the yarn in front, P3, P2tog, P1, turn.
Row 3: sl 1 purlwise with the yarn in back, K to the stitch before the gap, SSK to close the gap, K1, turn.
Row 4: sl 1 purlwise with the yarn in front, P to the stitch before the gap, P2tog to close the gap, P1, turn.
Repeat rows 3 and 4 until all stitches have been worked. Cut CC.
Gusset
Using the stitches that you slipped at the beginning of each heel turn row, you will pick up stitches along the heel flap to form the gusset and then begin decreasing to fit the foot.
*Note: the BOR (beginning of round) will change here. Each round now begins with the sole stitches and ends after the instep stitches. Move your marker to the new BOR.
Round 1: Return to your MC yarn, which should have been dropped before starting the heel. Using MC, pick up and knit 1 stitch in the ladder in the corner of the heel flap, then pick up and knit 14 (16, 18) st in the slipped stitches along the heel flap. K across the 16 (18, 20) st of the heel, then pick up and knit 14 (16, 18) st along the other side of the heel flap. Pick up one final st in the ladder in the corner of the heel flap, and knit across the 28 (32, 36) instep sts. PM here (if desired) to mark where rounds begin.
Round 2 (decrease): K1, SSK, K to 3 sts before instep begins, K2tog, K1, K28 (32, 36) sts of instep (2 sts decreased).
Round 3: K all sts.
Repeat rounds 2 and 3 until you have decreased to 28 (32, 36) sts on the sole: 56 (64, 72) sts total.
Foot
Continue knitting as established with no further decrease rounds until the sock is approximately 2 inches shorter than desired sock length. Tip: For a well-fitting, snug sock, the desired sock length should be about half an inch shorter than the wearer’s foot length.
Example: for a 10” long foot, the desired foot length is 9.5”, so you should stop knitting the foot when it is about 7.5” long.
Toe
Cut MC.
Round 1: Using CC, K 56 (64, 72) sts.
Round 2 (decrease): K1, SSK, K to 3 sts before instep, K2tog, K1, K1, SSK, K to 3 sts before sole, K2tog, K1 (4 sts decreased).
Round 3: K all sts.
Repeat rounds 2 and 3 until 28 (32, 36) sts remain, then repeat round 2 until 16 sts remain. Graft together remaining sts using the kitchener stitch. Weave in all ends and block if desired.
I love to see your works in progress and finished socks, so please feel free to tag me on Instagram if you share pictures! @granitestateyarns #picotshorties
You are welcome to sell finished projects made with this pattern if you credit me as the pattern designer. The pattern itself is for your personal use only, and is ©2024 by Lauren Cairns.
Happy Knitting!
❤Lauren

1 comment
Thank you for the great tutorial. Can you tell me what yarn and color you used in the video? I really like it!